Tales of a Wookie Wife: Fueled by caffeine and good intentions. Feed hairy man. Clean house. Be fabulous. Repeat. You can learn more about me here.

Friday, February 22, 2013

Eyelash Case DIY

I've recently started wearing false lashes occasionally and I love them as I hate mascara and they let me get away with skipping that part.  Don't get me wrong - I love the look of mascara, I just don't like the way it feels or that it takes days to wash off as none of the makeup removers I've found are gentle enough for my skin.  (That being said, I do have a new favorite mascara ever that came in the big box o' awesome that I'll be reviewing soon.)

Where was I?

Oh,  yeah.  False lashes.  I love them, but didn't have a way to store them and the boxes they come in tend to pile up in the makeup box.  I'd looked online and found a Dolly Wink case I just fell in love with, and also Violet made one (couldn't find exact link) that I thought was adorable that she made to hold lots of lashes and look like a mini-cake.  Since the Dolly Wink one was like $14 plus shipping or some crazy shit on amazon, I decided to make my own and combine the ideas of the two I liked.

This is what happened:


I took the mini desserts I made from my salt dough adventures, a cute little black bow I had stuffed back in a box, and a tiny pill case and made it into the most glorious lash case ever...today.


I started out with a key chain pill case I had sitting in my craft stash.  I peeled the ugly puff-sticker-badge thing off the top, then painted over it with white, then pink nail polish to get the light pink I so adored from the Dolly Wink cases.


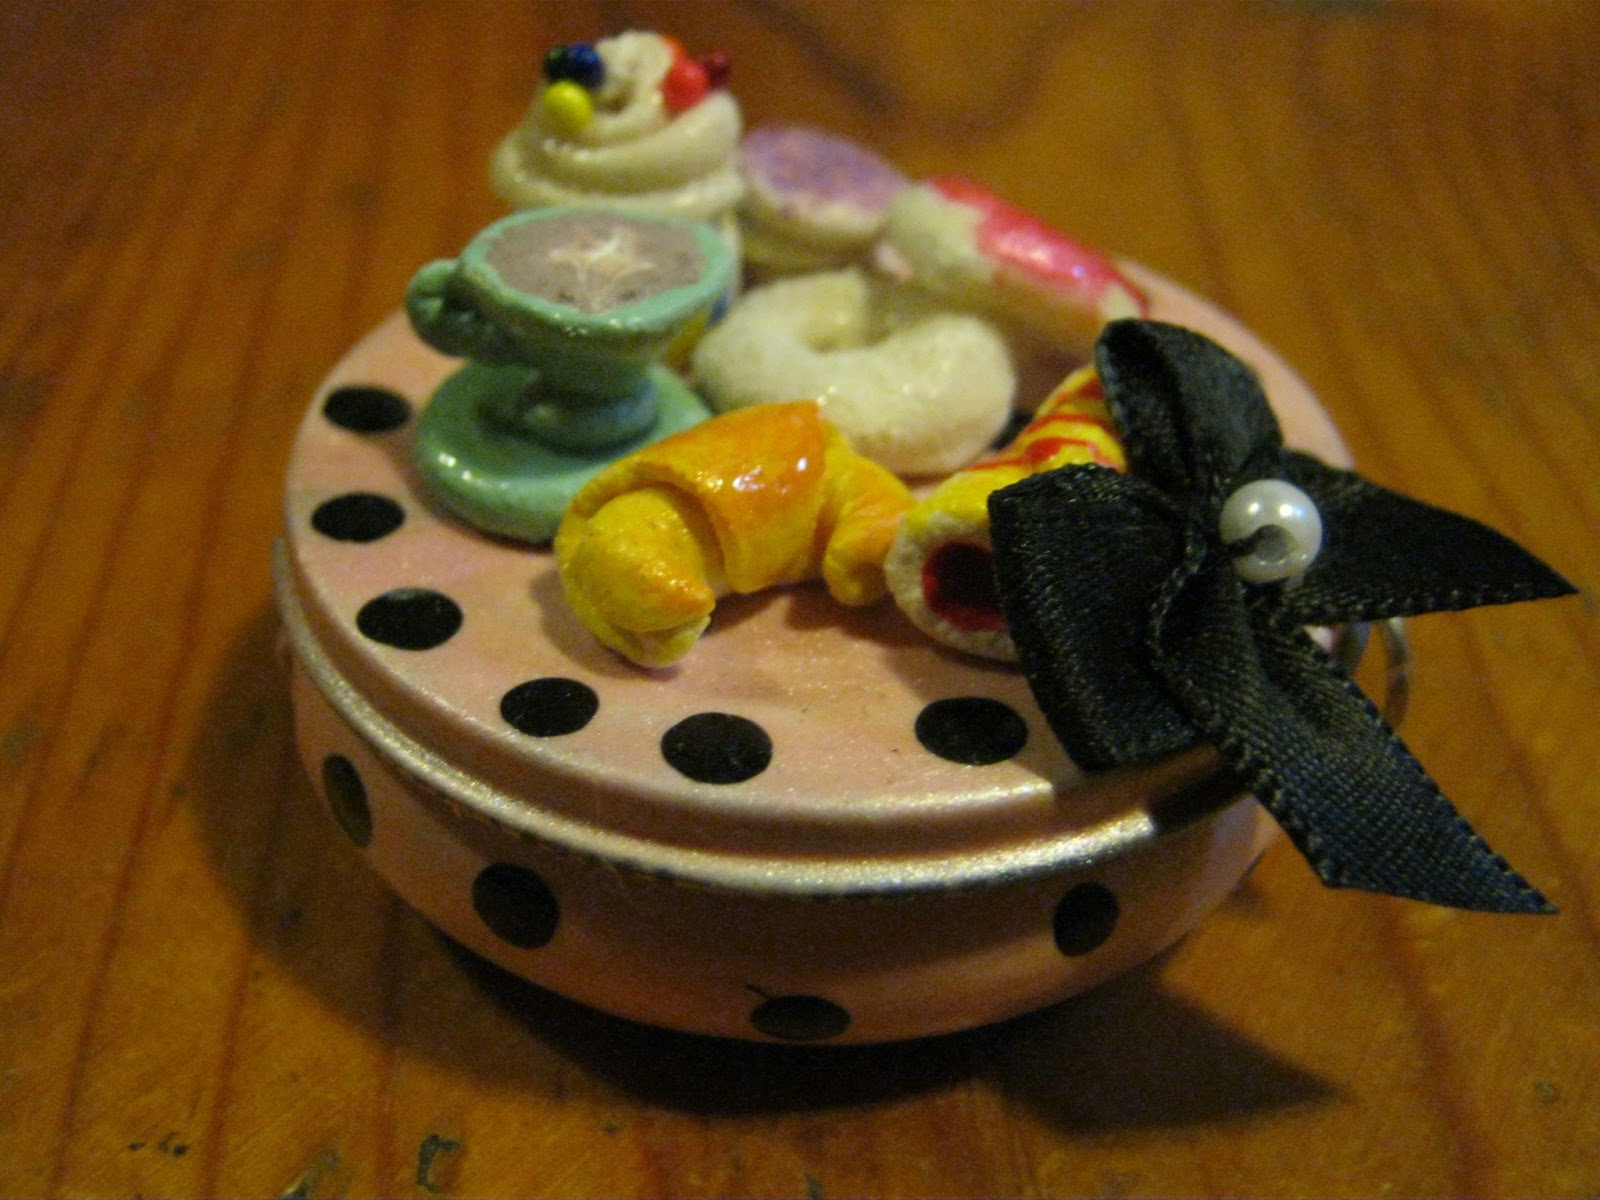
I used my homemade dotter and black nail polish for the dots.  I just glued the desserts on with nail glue, then covered the powdery-ness parts that showed after drying with clear nail polish.  I'd recommend using a better glue, but I didn't have one, so oh well.


Here it is next to a penny so you can see how teeny it is.  (The Wookie's idea - this is why I keep him around, he comes in handy.)


Lastly, here's a shot of the inside.  I don't have many lashes yet, but it holds them nicely and looks a lot better in my makeup box (ok, ok, I'll be honest, it usually ends up just sitting on a tray in the bathroom), than all the little plastic and cardboard things the lashes come in.  You have to push the little ring in to get it to open, so I love that this thing can bounce around a makeup bag or box and not come open.

Moral of the story?  Don't pay a crazy amount for something you can make at  home for free...It may even turn out cuter than the product you'd wanted to start with!

<3

Wookie Wifey

Wednesday, February 20, 2013

Piggy Paint Update - Pink Swatches

Here are the other swatches from the Post-Yule Haul Mini Piggy Paint Kit.  You may remember I was not at all impressed with the green.  I'm sorry to say that with all my high hopes for this brand, I must give them two thumbs way, way down.

See for yourself: One coat...


Two coats...at this point I noticed it was just as crappy as the green and only did my thumbs.


Three coats:

You can even see in the picture of three coats how sheer and streaky it is, but it was much worse live.

Sorry, Piggy Paint...thanks, but no thanks.

<3
WW

Wednesday, February 13, 2013

Easy Brush Storage

I've forever fought with makeup brush storage.  I hate the look of the brushes just tossed in a cup either alone or with rice/marbles in the bottom.  They always seem to fall and slide damaging the bristles, etc.  The cases I've found to be damaging to the bristles also, as well as a pain to get to the brushes you need quickly and easily.  I'd come up with a few ideas for storage that I thought may work, and after a few DIY fails, I realized I already had what I needed.  Don't ya love how that works?  :)


I previously had my brushes just plunked in a tea cup for lack of anything better at the time.  I'd tried something larger with the marbles in the bottom and hated it as it never seemed to hold things where I wanted them.  Rice didn't work out well, either, as I store my makeup and brushes in the bathroom and there's, you know, the whole 'humidity' thing.


As you can see, my brushes were already beginning to show some not-so-great signs from having knocked against each other so much.

Solution?


A vintage stamp holder I had sitting with my craft stash that I didn't have plans for yet.  I just loved this thing the second I saw it, but it had sat on the shelf for the better part of a year as I wanted the *perfect* use for it where it could be both useful and on display.


Its perfect!  It holds all my brushes and tools, and my most-used liners, gloss, and mascaras.  The larger face brushes just clipped right in the...stamp holders?...stamp clamps?  And many of the smaller things just slid into the little triangles right behind them tightly enough to hold them there.


The test tubes were from either candies or Halloween sprinkle containers I'd saved because I thought "These are cute.  I'll use these someday, I'm sure," and it paid off.  I just clipped them into the little stamp-holders, put a few marbles in the bottom to raise the shorter brushes up, and there we go!  I adore this and it is so much more aesthetically pleasing than a jar o' rice, in my opinion!  >.<

<3
Wookie Wifey

Thursday, February 7, 2013

Crafty - DIY Gir DVD Drive

My DVD drive burner thingy went out in my laptop.  Hubs, being awesome, got me an external for Yule.  There was a cute pink one I wanted, but it was about $40 more expensive than the black one, so I said fuck it, get the black one and I'll just paint it myself the way I did the mouse and game controllers.


First thing I did was paint the basic color I wanted.  I used a purple nail polish and it is actually darker than it shows up in the pictures, but oh well.


 Then, I painted the design I wanted on it in black nail polish.  This is one of the ones with the little nail art brushes.


Next, I began layering on the color, drawing accessories, and added glitter around the doodads in the background as a last impulse, but it turned out to make it way cuter, so that's all good  The colors took quite a few layers as this purple turned out to bleed with other cream colors quite badly.
.

And done!


Saved $40 and its WAY cuter than the plain pink one was!

<3
WW